
Today I am going to share my thoughts and experiences with the French Knitting Bee
I often noticed the French Knitting Bee while shopping at my local craft store, the cuteness of the product caught my eye even though I wasn't really familiar with french knitting (That's right... I hadn't heard of French Knitting.. Ha and I call myself a crafter!). One day after "umming" and "ahhing" in the wool aisle for quite some time I decided to purchase this little Mr and give him a go.
If you're not familiar with this product or French Knitting
The knitted cord can be used for a variety of accessories and home decor pieces such as bracelets and coasters - great huh?!

Now that you're in the know, let's continue on with the French Knitting Bee how to guide :-)
You can purchase your own French Knitting Bee in a variety of colours from your local craft and haberdashery store, such as Spotlight or Lincraft.
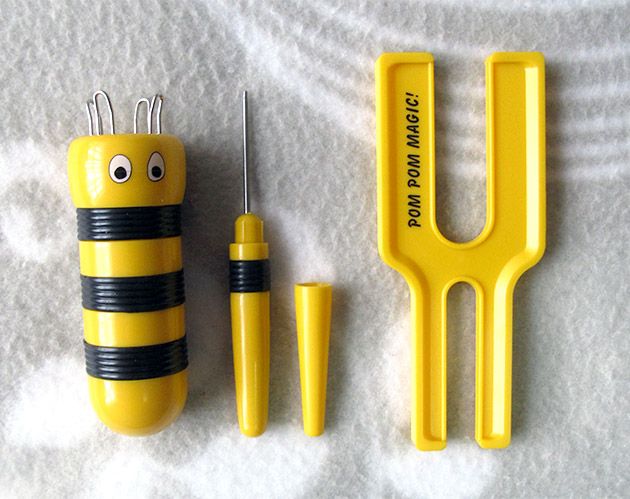
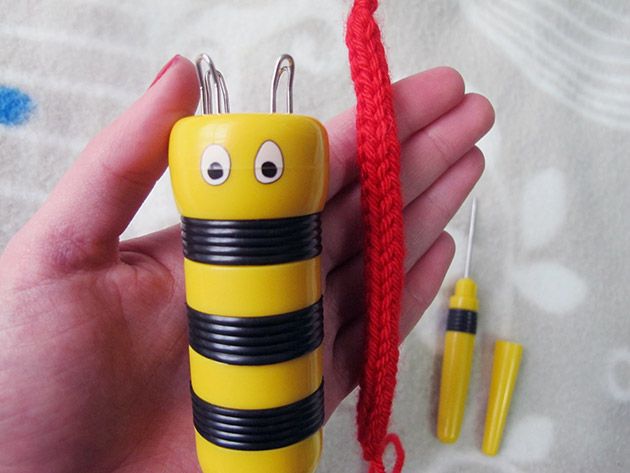
You will receive:
♥
The french knitting bee (FKB)
♥ The awl to assist with weaving/casting
♥ Bonus "Pom Pom Magic" pom pom maker (PPM)
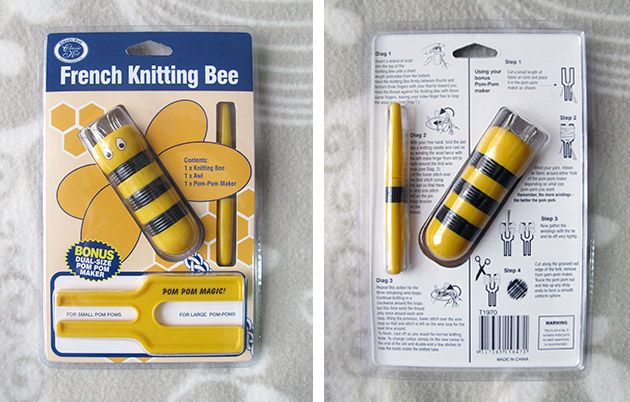
The packet lists handy instructions on how to use the FKB and PPM, but I find learning from others to be quite helpful too. Hopefully the below instructions and pictures can assist you! :-)
(Please note: My method is a little different to the instructions on the packet, if you have any questions please don't hesitate to ask! First difference is I cast on CLOCKWISE rather than anti-clockwise. As far as I am aware there is no difference with the finished product, I just find it a lot easier and far more natural to work in this pattern!)
1. Firstly, you must insert a thread of yarn into the top opening of the FKB. Continue the yarn through the "body" of the spool until a little length of yarn protrudes from the bottom (almost like a tail haha!)
TIP: If you are finding it hard to thread the yarn through the bottom opening, a crochet hook can be a handy "yarn grabber". Also, make sure you keep a light grip on the yarn "tail" as this is a very important part of spool knitting! :-)
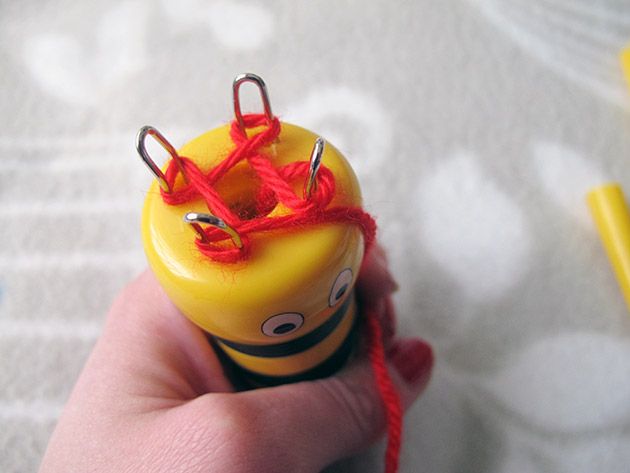
2. While holding the tail, take the "top section" of yarn and loop it around the first peg in an "e" like shape (going clockwise around the peg). When done correctly you will naturally go to loop around the next peg, to your right, in the same fashion. Overall you are going in an ANTI-clockwise motion around the spool, but you will be wrapping the "e" shapes clockwise around the pegs. Keep looping these "e" shapes until you have looped all four pegs like the below image.
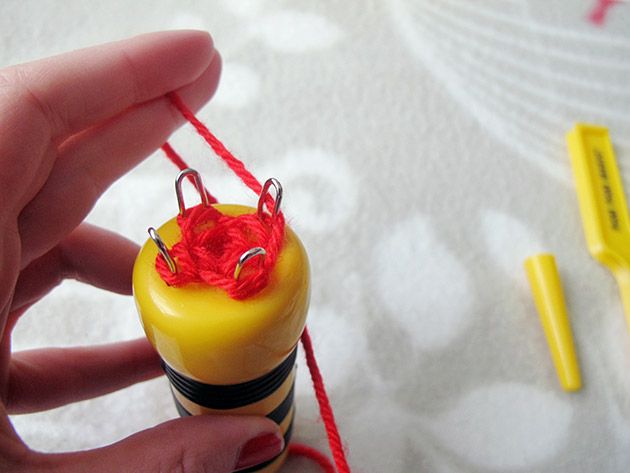
3. Take the "top section" of yarn anti-clockwise with your left hand and position it ABOVE your "e" loops on the first and second peg (pictured below). Now we begin to introduce the awl into French knitting :-)
4. With the awl, carefully pull the bottom thread of yarn ABOVE the newly wrapped thread, and then OVER the peg. You will notice the "stitch" has disappeared down into the spool hole. Gently tug on the yarn tail to make the stitch tight. Move onto the next peg to your right.
5. Continue this motion around each peg of the spool. If you talk yourself through the motions it will sound something like this "Position, above, over, tug. Position, above, over, tug..."
Note: Tugging the tail is not required after each thread but I find doing it every now and then keeps the cord nice and tight :-)
After a few minutes you will notice the cord starting to poke out of the bottom of the spool, keep French knitting until the cord has reached the desired length!
French knitting can sound rather confusing, so to make things a little easier here is a video to demonstrate Steps: 3* - 5. This video was taken on my FIRST ATTEMPT so please excuse my slight shakiness, but as you can see.. it's very simple even for a beginner :-)
6. To cast off you will need to snip your yarn from the ball and position the "top section" as you would normally. When you pull the bottom thread ABOVE and OVER the peg, continue to pull the remaining (that is on the peg) yarn's loose tail through the stitch so it is no longer on the peg. Do this for the remaining 3 pegs and you will have successfully cast off!


* Overall, how did you find French Knitting *
Initially, I found French Knitting to be a little daunting, I had to pay great attention to casting on and the knitting motion to make sure I was doing it correctly. Once I got in the "groove" my knitting became quite fluid and I increased greatly in speed. Although far more time intensive (in my opinion) than crochet I really like the end product; the woven cord is very pretty and the intricate design looks impressive.
* What were your thoughts on the "French Knitting Bee" product *
Very cute and eye catching! The French Knitting Bee is a little more fiddly than what I was used to, but it's all about PRACTICE, PRACTICE, PRACTICE. It does get easier and you will soon be watching TV while you French knit hehe, (plus there's no counting so feel free to chat away!!) The French Knitting Bee is very comfortable to handle and the rubber "bee stripes" make the spool easy to grip. The pegs are a very slippery so until you are a confident French knitting pay CLOSE attention to the "ABOVE the thread and OVER the peg" motion, as you don't want to un-thread all your hard work.
* Any suggestions? Improvements that could be made? *
If the pegs were shaped slightly different like this it would make the ABOVE and OVER step a lot easier as the yarn could catch and not slip off. The directions on the back of the packet assume you have knowledge on how to knit and list casting off as "cast off the same as knitting" - a little more detail would be very handy!
I really like this product and will continue to use it :-) I definitely recommend it to anyone who is wanting to learn a new skill. The woven cord looks really pretty and I have already incorporated it into a few of my upcoming store products. With a few little improvements the French Knitting Bee could move from a good product to a GREAT product.
* Overall rating *
3 acorns out of 5

Hope you enjoyed this review and please feel free to post your experiences with the French Knitting Bee and any feedback :-)

Great post Ami! I look forward to seeing what creations you will make out of this new talent :)
ReplyDelete3 acorns-so cute. I love this. The possibilities are endless....:)
ReplyDelete